Monday, December 23, 2013

Tips and Tricks for Making Chocolate Covered Pretzel Rods

So, by now, you all know that I'm lovingly known as Last Minute Lucy around our house! Last night I decided to make some of those really cute chocolate covered pretzels that you see all over Pinterest.

They turned out great and I learned a few things along the way that you might find helpful.

Chocolate Bark, Candy Coating, Holiday candy, Christmas candy,

1.  There are around 30 pretzels in a bag of Snyders Pretzel Rods.


2. I used chocolate and white candy bark.  

3.  3 cubes of bark melted in a large coffee cup is the perfect size to cover about 12 rods.

4. Use a spoon to dish the chocolate over the rod to cover evenly.  An even thin coat works best.

5. Lay the rods on to a cooling rack to dry.  Spray the rack with cooking spray first. The the most important part of this process is to not let the rods dry too long or they will become embedded into the rack and will crack when you try to remove them.  I let them dry almost all the way and then laid them on wax paper - that's after the first batch that were left to long and a few broke in half when I tried to remove them!!!

6.  After they are completely cooled, it is time to decorate!  Use white bark on the chocolate covered rods and chocolate on the white bark covered ones.  I spooned small amounts of the melted bark into a disposable Wilton cake decorating bag and snipped the tip off to get the thin strips of chocolate on to the rods. Be careful because the bark might be hot.  I had to use a dish towel to hold the bag.

Chocolate Bark, Candy Coating, Holiday candy, Christmas candy,

7.  Before the bark hardens, sprinkle with candy sprinkles. I picked these up at the Target Dollar spot and just love the little holly leaves.

8.  Let dry thoroughly and package in clear treat bags. I got mine at Dollar Tree (Thanks Mom!) and they were the perfect size for 5 rods.

Chocolate Bark, Candy Coating, Holiday candy, Christmas candy,


All in all, it's quite a bit of work, but they are really fabulous looking.  Everyone at work thought they were pretty snazzy - plus they are tasty too.  Crunchy, salty and sweet - the perfect combo!

Tomorrow is Christmas Eve!!! Ready or not! Here it comes!  Wishing you all a blessed Christmas with your family.  As our Pastor said on Sunday "Happy Jesus' Birthday!"

Photobucket


We're on the Fence! Won't you take a minute and vote for us?

Saturday, December 21, 2013

Christmas Book Village

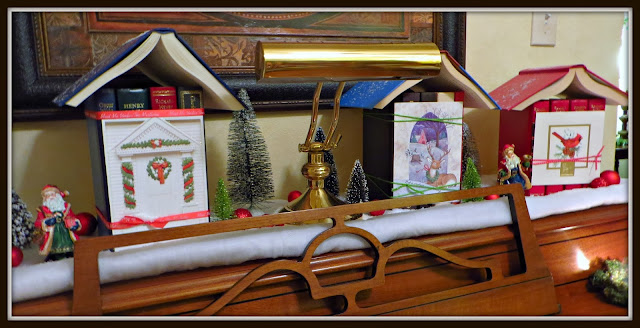
I was blessed to have a Mother who loved to read and passed that love along to me.  I also married a book lover and raised  Leigh up to be one too!  Being a book lover, I'm also a library nerd and saw this awesome idea at our local library here in Crosby.  As soon as I saw it, I knew that I just had to have one of my very own.  Christmas houses made of books? Two of my most absolute favorite things and I knew just the place to put it - on the piano in Mr. Crafty's office.

Christmas Village, book crafts, Christmas DIY

 This is so incredibly easy and doesn't damage the books in any way.  Just take four to five books (depending on how wide you want your house to be), find an appropriately sized Christmas card for the front and tie the card on to he books with yarn, string, or ribbon. Then open a book for the top.  Add a little snow batting, bottle brush trees and fake snow and you have an adorable village.

Christmas Village, book crafts, Christmas DIY

Christmas Village, book crafts, Christmas DIY


I can tell you that this is going to be a permanent fixture of our Christmas decorating for many, many years to come.  It is just adorable and made of books which is something we have an abundance of!  Readers Digest books are the perfect size for this and since we collected them for most of the 90's - we have them in every color under the rainbow!

So easy, quick and cheap!!! Stress free Christmas decorating at it's finest.  Wishing you all a happy and stress free Christmas!


Photobucket


We're on the Fence! Won't you take a minute and vote for us?

Monday, December 16, 2013

Easy Christmas Decorations

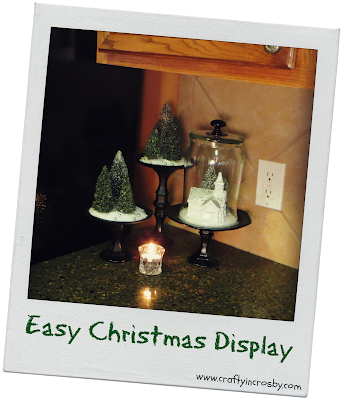
I just love all of the retro bottle brush trees that everyone is using in their Christmas decorations this year. For once I was smart and got quite a few packages from Dollar Tree very early in the season! I didn't know exactly what I would do with them then, but knew that I could add them in somewhere.  I also came home with a Christmas Village church from Dollar Tree with the idea that I would paint it white like several others I had seen on Pinterest last year.

I love how this display came out - it really looks terrific on the kitchen counter!


Dollar Tree, bottle brush trees, Christmas Village, easy Christmas decorations,

The church looks fantastic under the bell jar we made at Halloween, and with the addition of some silver glitter on the roof and some fake snow, it makes the perfect little still life.  I've left the other two stands uncovered and added a few small silver berries to the snow.  They make the perfect accent.

Dollar Tree, bottle brush trees, Christmas Village, easy Christmas decorations,!

I think I should have added a little silver glitter on the tips of the trees, but maybe I'll get around to it next year!

Dollar Tree, bottle brush trees, Christmas Village, easy Christmas decorations,


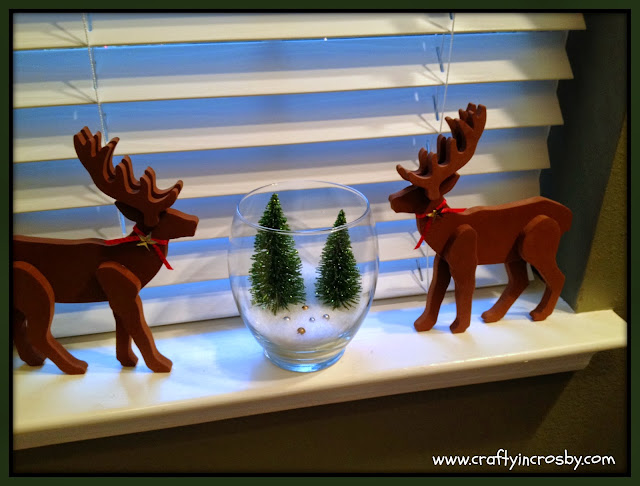
I also used a couple of the glittery green trees in a small Dollar Tree glass globe, along with two foam reindeer from Hobby Lobby on the bathroom windowsill.  So festive, easy and inexpensive. 

I like to think of it as Updated Retro Decor! (makes it sound so much more elegant!)

Dollar Tree, bottle brush trees, Christmas Village, easy Christmas decorations,


The house is decorated and the lights are up outside.  Most of the gifts were purchased online this year, so I only have a few things left to buy.  This is quite and achievement for me, since I'm usually the Queen of last minute shopping!

Hope you are staying sane and calm this holiday season!

Photobucket

We are linking up to Fluster's Creative Muster. Stop in and see us!


We're on the Fence! Won't you take a minute and vote for us?

Saturday, December 14, 2013

Evergreen Snowman - Simple and Quick!

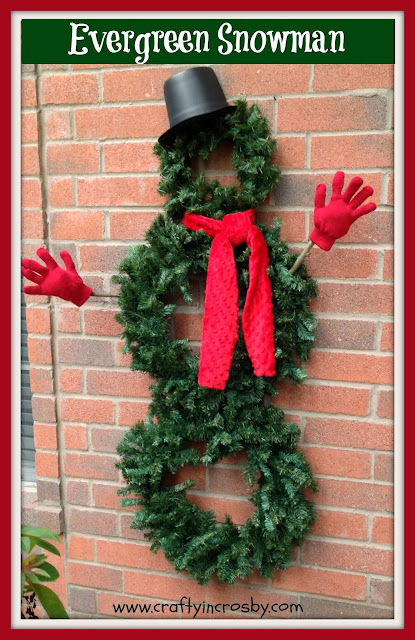
Today is D Day! Decoration Day that is! Finally getting the house completely decorated and ready for Christmas.  And I finally got around to putting together an Evergreen Snowman.  I bought all the supplies last year but ran out of time to get him made.

Quick and Easy and very appropriate for our neck of the woods.  These are about the only kind of snowmen we have here in Crosby!

Christmas, Outdoor Decorations, Christmas DIY
 Took all of about 30 minutes to wire the 3 wreaths together and decorate.  The scarf is just a length of velour and the hat is a foam hat from Michaels that I cut in half and hot glued on to the top wreath.  I stuffed the gloves with plastic grocery stacks and stuck them on to branches that are wired in to the middle wreath.

Christmas, Outdoor Decorations, Christmas DIY

This snowman should last for many years to come!  Now it's back to decorating - one more tree to get up and decorated and then we are done!  Hope you all are having a wonderful Christmas season!


Photobucket

We are linking up to Fluster's Creative Muster. Stop in and see us!

We're on the Fence! Won't you take a minute and vote for us?

Tuesday, December 10, 2013

Mom's Christmas Mantel

December is such a crazy busy month for us, so we don't have a lot of posts.  I try not to stress myself out too much, and cutting back on the blog posts is one of the first things to go!

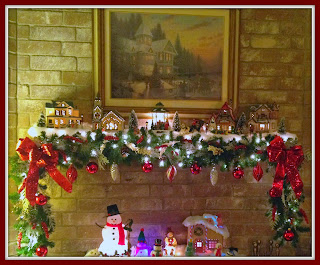
But I did want to share my Mom's gorgeous mantel with everyone.  She made a new swag for it and I absolutely love it. I do have to warn you that the pictures were taken with my Iphone, so they are very poor quality.


Christmas mantel, snow village, Christmas Village, garland

Christmas mantel, snow village, Christmas Village, garland

Christmas mantel, snow village, Christmas Village, garland

Christmas mantel, snow village, Christmas Village, garland

I just love the combination of the snow village with the garland and the beautiful ornaments, not to mention the silvery white branches mixed in.

As you can see, Leigh and I both got the crafty gene handed down from her! Love you Mom!


Photobucket


We're on the Fence! Won't you take a minute and vote for us?

Sunday, December 1, 2013

Easy DIY Hurricane Christmas Candles

We are very traditional people when it comes to Christmas.  We like the same decorations in the same place, so I don't usually have many new Christmas decorations to share.  But we did add some very easy to make candles this year.  Made them with supplies from Dollar Tree and Brach's peppermint candies.

Christmas Crafts, Peppermint, candle, diy, hurricane candle

Here's what you will need - 

1. Glass Candlestick
2. Glass Cylinder Vase
3. Glass Cylinder Candle
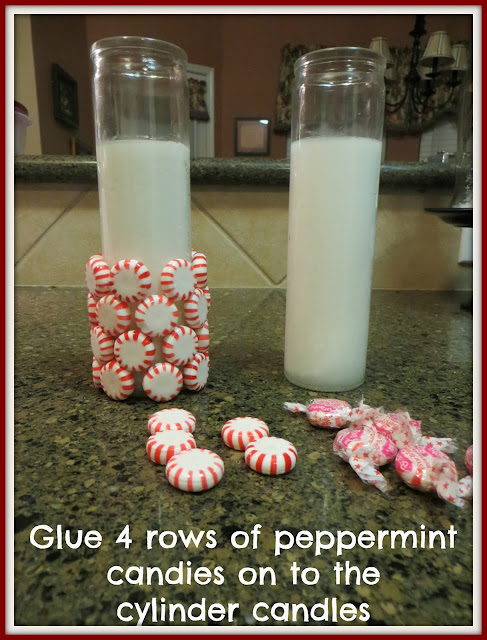
4. 32 Peppermint Candies

First 3 items came from Dollar Tree and I got the peppermints from Wal-Mart in the giant economy bag.

To make the Hurricane glue the candlestick to the bottom of the vase with E6000 glue.  Then use hot glue to glue the peppermints on to the glass candle.

Christmas Crafts, Peppermint, candle, diy, hurricane candle

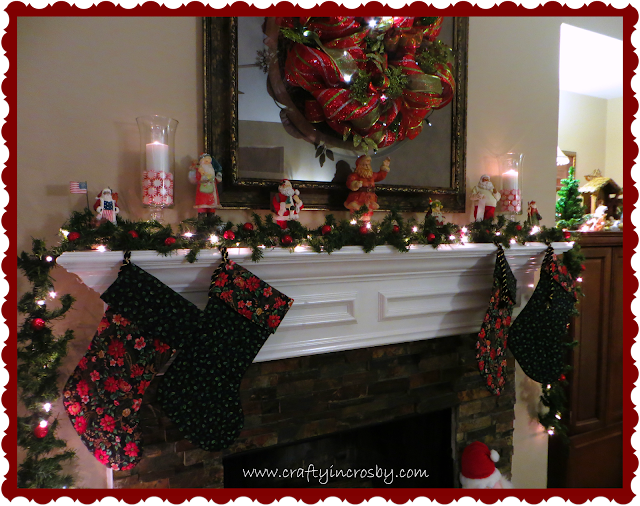
That's it! Super ease and so cute on our mantel - what do you think?

Christmas Crafts, Peppermint, candle, diy, hurricane candle, mantel

Christmas Crafts, Peppermint, candle, diy, hurricane candle

Christmas Crafts, Peppermint, candle, diy, hurricane candle, mantel

It's beginning to look a lot like Christmas out here in Crosby! Well, maybe not a lot since I only have the mantel decorated..... but, at lease I've started decorating!  Wishing you all a wonderful week!


Photobucket


We're on the Fence! Won't you take a minute and vote for us?

Thursday, November 28, 2013

Happy Thanksgiving

Wishing you all a wonderful Thanksgiving! We are so thankful for all the blessings in our life and especially thankful for all of our readers who have shared in our blogging journey.


Give thanks to the LORD, for he is good; his love endures forever.

Photobucket


We're on the Fence! Won't you take a minute and vote for us?

Saturday, November 16, 2013

Simple Fall Banner and Thanksgiving Mantel

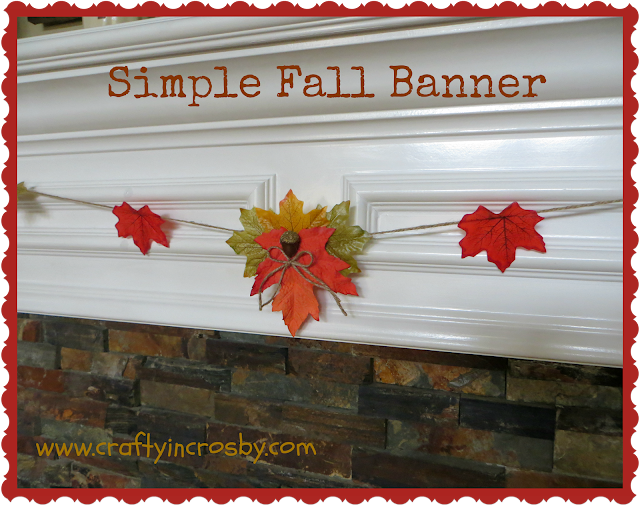
Last year, we made these really cute Leaf Angels and I never got around to sharing them on the blog.  We turned them in to magnets last year, but this year I thought they would make a cute banner for our Thanksgiving Mantel. They are so easy to make with silk leaves, faux acorns from Hobby Lobby and a twine bow.

leaf angels, acorns, Thanksgiving Banner, easy fall banner
 The leaves and angel are hot glued on to twine and that's it! 
Super easy and looks so pretty against the white mantel.

We found the white owl vase at Michael's on clearance for $3.00 !! With the addition of some wire photo holders and vintage Thanksgiving postcards, it is the perfect addition to this year's mantel.  


Look at Ty's adorable snow owl that he made at Sunday School.  It looks so cute next to the plate from last year.


We are wishing for some fall weather to go along with our Fall Mantel out here in Crosby.  Is it cold where you are? Send some our way, will ya!


Photobucket


We're on the Fence! Won't you take a minute and vote for us?
Friday, November 8, 2013

Easy Upcycled Dollar Tree Pumpkins

So I finally started taking down the Halloween decorations, ok, well, we got the plastic storage tubs out of the closet and down stairs. That's a start - right? And during the process I found some Dollar Tree pumpkins that I hadn't done anything with.  The next thing you know, I was in the craft room, crafting away! Besides, who wouldn't choose crafting over putting away and cleaning up? Duh!

Everyone has seen those super ugly orange pumpkins at Dollar Tree and most all of us have upcycled them for Halloween - see some of ours HERE.

I decided to make them look a little more elegant with a shabby chic flair!

Dollar Tree, Dollar Store, Fall Decor, Pumpkins,


They were so easy and most of us probably have a few laying around the house that could use a make-over.

Here's what you need - 


1.  Cut the stem off the pumpkin with a craft knife. 

The pumpkin got photo bombed by our kitty Jasmine!


2.  Tear 3 strips of fabric - each 3" to 4" wide

3. Gather the fabric and secure with a straight pin to the top.


3. Continue winding the fabric around the pumpkin twisting if necessary and securing with pins.


Until you end up with all 3 strips pinned to the pumpkin and it looks like this - 


4.  Form a cone with the burlap ribbon like so - and cut as shown.


5. Open up the cone and reform with the finished edge on the outside and glue the edge down with hot glue.


6. Trim the edges as needed and tuck into the cone.


7. Cut 2 - 5-6" pieces of the wire edge off the ribbon.


7.  Twirl to make the curly vines.


8.  Hot glue the stem and vines to the top of the pumpkin and add leaves as desired.


And you will end up with these beautiful fall pumpkins!

Dollar Tree, Dollar Store, Fall Decor, Pumpkins,
I made one out of a lightweight beige sheet weight material and the other out of nubby muslin.  They are both such beautiful additions to our fall decor.

Happy Fall Y'all !!!


Photobucket


We're on the Fence! Won't you take a minute and vote for us?


Related Posts Plugin for WordPress, Blogger...